In this tutorial, we'll look at some of the ways you can save and
display your CorelDraw images.
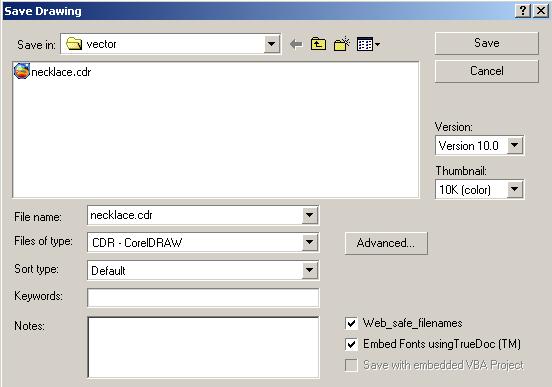
If you do a simple File > Save, your work will be saved in Draw's
native format - .cdr. You can't display this on the internet, and other
graphics programs may not be able to open it, but saving this way will
will preserve all the features of the drawing.
Here, I've given my drawing a name and let the program supply the filename extension (cdr). I'm saving in version 10 format. This is an important consideration. Older versions of Draw might not be able to open this image.
I am saving a color thumbnail with the image. This will cost me 10K
of disk space, but if I'm saving to preserve all of it, I may as well go
for broke. I backup my documents on CD disks every month, so I'm not worried
about the storage sizes.
When you export a file, you are saving it in a format that can be opened
by a different program. Draw offers as many choices as the creators were
able to think up.
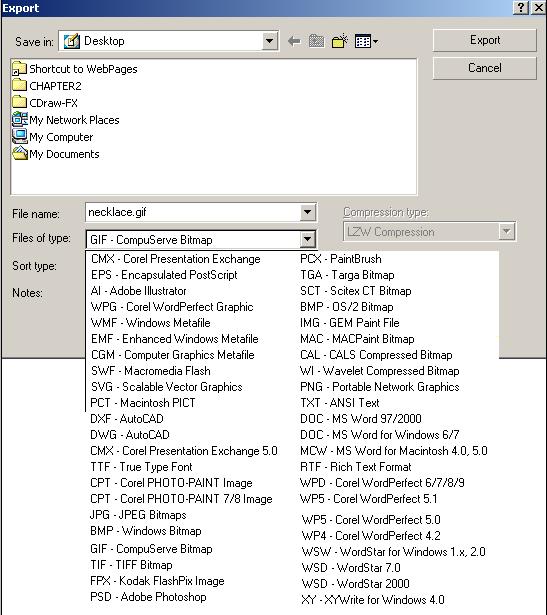
You can create a drawing and export it as a GIF. Then insert it into your webpage. This should provide a good copy on most Draw images.
1. File > Export, GIF.
2. You'll see this dialog box.
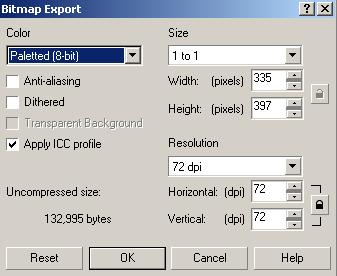
3. Because my image is intended for monitor display,
I have set my resolution to 72 dpi. (I hope you are experimenting, too.)
4. I have unchecked Anti-alias (edge softening)
for this test.

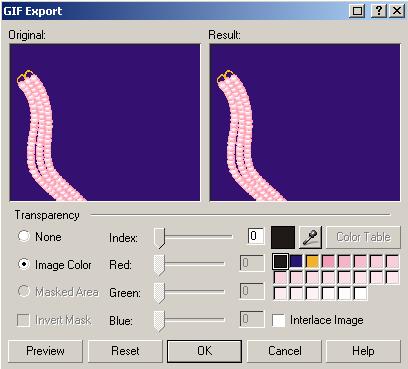
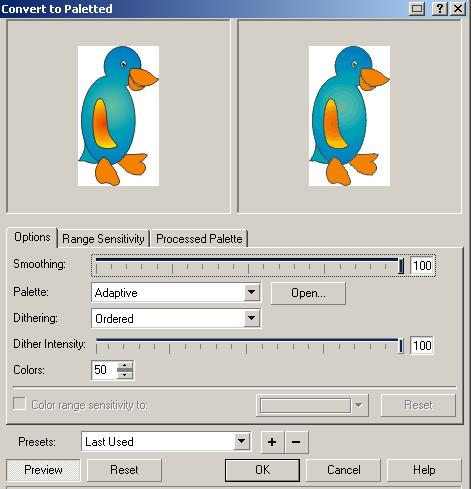
5. The Preview window then appears. The original image is on the left, and the result of saving at these settings is shown on the right. Here my choices include Optimized and Colors. I can't see any loss of quality in the result, so I'm going to leave my settings at this level.
6. A new window appears, and you might be getting confused by so many dialog windows just to save a simple GIF. Don't let them throw you. If the result looks okay, you can just accept the defaults. That's what I'm doing here.
7. With no more ado, the dialog boxes have vanished. Presumably my image is saved. Let's open it and see what it looks like.
This is the image, and it looks excellent - exactly the way it looked
on my screen when I saved it. The size of this image is only 9K. That's
acceptable for web display. I'm entirely satisfied with the results.
This necklace is the result of a tutorial at
http://www.orionnetlinks.com/CorelDRAW/necklace.asp
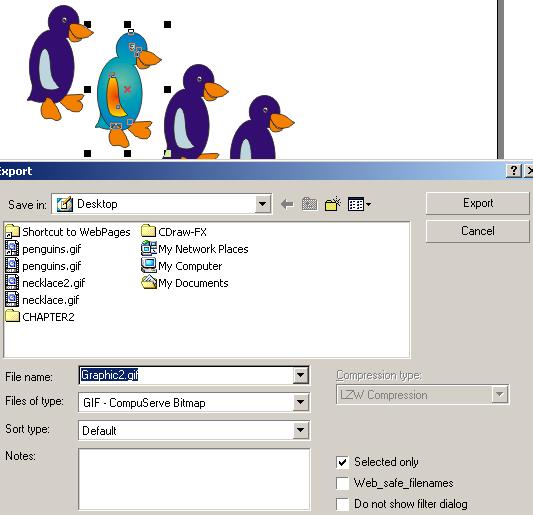
1. This time I've drawn myself a small flock of stoop-shouldered penguins. But I only want to save one of them. I've selected the most likely penguin, and clicked File > Export.
2. A new option has appeared on the Dialog box - "Selected only." By default, it's checked.
3. By following the same steps as before, I will save the selected part of my image.
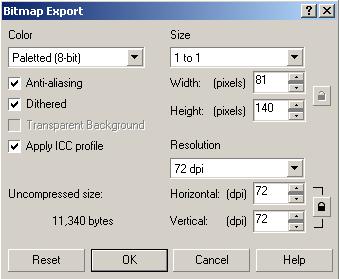
4. This time, just to see what happens, I've checked "anti-aliasing" and "Dithered." These options should soften edges and blend Any shaded colors in my drawing..
5. Because I put some color gradients into my drawing, I'm concerned about the smoothness of the image. In fact, it might be better to save this guy as a jpg, but I have decided I want him on a transparent backgrand, and that can't be done in JPG format.
Here are my settings at this point.
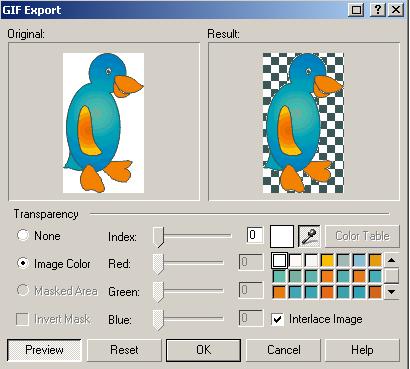
When I click the white color spot beside the eyedropper and click on the white background in the Original side, the transparency grid on the right shows me what portions of my image will allow the background of my webpage to show through.

And here is the final result on this one. Not bad, considering the
gradient. He's acceptable for use in an animated gif.
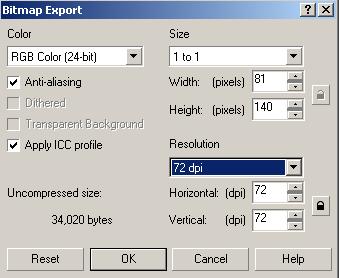
2. I clicked the Reset button to get rid of any previous settings. CorelDraw will remember the settings you used last time, and attempt to apply them to the current image.
When I clicked Reset, Draw automatically set the resolution to 300 pixels per inch (which it calls dpi - dots per inch.)
3. I have set the resolution back to 72.
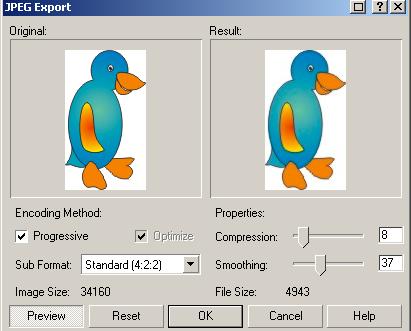
4. In this next dialog box, the defaults aren't going to do it for you. Your task is to adjust the compression until you no longer see the results of jpg compression. As compression goes down, file size goes up. Increasing Smoothing will reduce the file size, but you'll start to lose detail if you aren't careful. This is a trade-off, and be sure you have the Preview button clicked.
5. Time to put the final result into my webpage document and see how well I've done.

6. Here he is. Not bad at all, and only 5K.
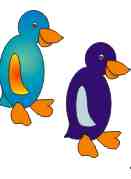
BTW: One of the penguins in the above row is a GIF. Can you spot it?
I put it there so you could see the difference. GIF isn't the best way
to go if you have blended colors; for those "continuous tone" images, you'll
want to go with JPG format.
To capture the parts of the screen I want to paste into my webpage, I use a great little program called UltraSnap. Among other features, it lets me decide on the quality of the paste.
 Low
Low
 Medium
 High
High
You can download UltraSnap from http://www.mediachance.com. It is shareware, so you can try it and use if for as long as you like. If you decide you can't live without it, it will cost you $28 to get registered. I think it is worth the price. It stays memory resident, and you use a shortcut of your own choosing when you want to capture a bit of screen. I use the Windows key (that little flag at the bottom of your keyboard) plus W. The UltraSnap cursor appears and I just drag around the part I want to capture. Then I Ctrl-V (paste) the capture into my document.
Screen Capture is the quickest way to put something on your webpage,
and you probably shouldn't open a second major program to do it. With CorelDraw
and your webpage creator open, memory considerations make this a crash
looking for a place to happen, and it also takes too much time.
1. Choose File > Publish to the Web > Web Image Optimizer. You'll get this dialog box.
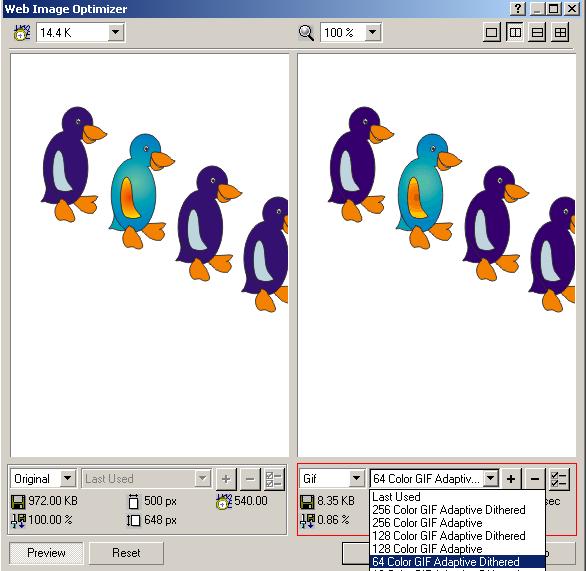
You should choose the settings that will be best for your image. I've decided to go with GIF again this time. I've chosen the 64 Color Adaptive Dithered method. My file size will be 9K and the loading time will be 4 seconds.
Notice that I didn't have anything selected this time, but it wouldn't have made any difference. The Optimize to Web feature doesn't take your selection into account.
I've put a border around this image so you can tell where it really
ends.
All that white space is not the result of my hitting the Enter key too many times.
CorelDraw looks at your image as a sheet of paper -- a document on a
page that has a certain size. It's giving me my penguins at the current
zoom size and including the white space around them. This would be great
if I were saving this document as a complete html page, but it's not what
I had in mind for saving my drawing.
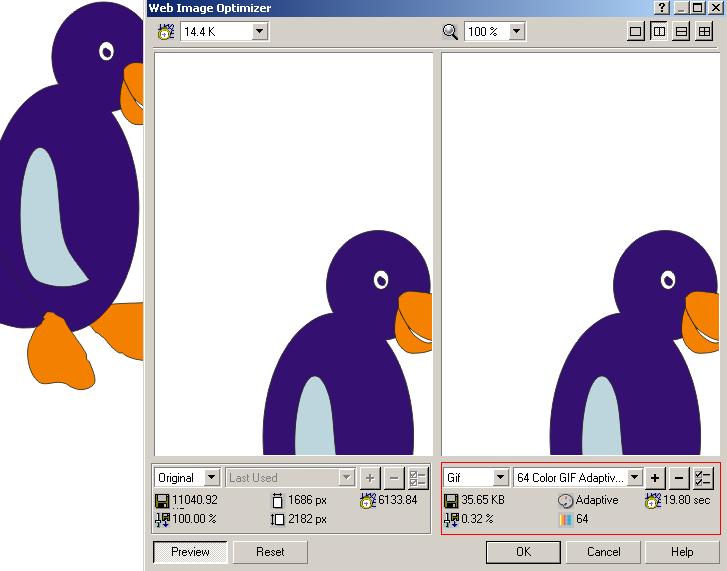
Notice the file size and loading time, indicated on the right bottom of the dialog box.
Also notice the magnifying glass at the top of this dialog box. This lets you zoom out, if you've come to the box at too high magnification. Let's see if this will help us.
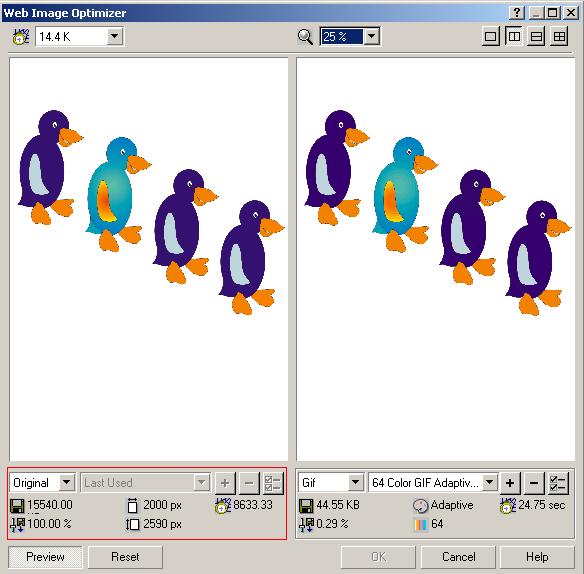
I've used the magnifying option to zoom out from my image in the Optimizer
dialog box.
But this is still the result!!! (You'll have to scroll down and right to see it.)
Moral: You're probably better off using the Export feature and manipulating your own settings, even though it might take a little practice to get them optimal.
This is the end of the image, way down here.
I hope this will help you with saving your CorelDraw images and displaying in a web page. The answer is: Export.
Christine Frey, 2002